
2025 update
There’s now an even simpler way to install Home Assistant OS on Apple Silicon Macs: use VMware Fusion (free as of 2024) instead of Docker. This new method is easier to set up and offers USB passthrough, which is often desired for Zigbee/Z-Wave dongles. You can find the article here: How to run Home Assistant on Apple Silicon using VMware Fusion
If you prefer Colima and Docker, the original article is below.
Home Assistant in Docker
Please note that this article uses an old version of colima due to a major networking refactor done in 0.6.0, so you may be missing important updates.
Home Assistant is a popular open-source platform for home automation that allows you to control and monitor your smart devices from a single interface. It can run on various platforms, including macOS, but it requires a container runtime such as Docker to work properly.
Docker is a software that enables you to run applications in isolated environments called containers. It makes it easy to deploy and manage your applications without worrying about the underlying infrastructure or dependencies.
However, Docker does not run natively on macOS, because macOS uses a different kernel than Linux, which is the operating system that Docker is designed for. Therefore, you need a virtual machine (VM) to run Docker on macOS. This VM acts as a bridge between your macOS host and the Linux-based Docker containers.
One of the most common solutions to run Docker on macOS is Docker Desktop for Mac, which provides a graphical user interface (GUI) and a full-featured Docker service. Unfortunately, I’ve noticed that it suffers from instability on M1 Macs, completely locking up some time after starting and causing all containers to stop working.
In this post, I’ll demonstrate how to set up Home Assistant on macOS using Colima and Docker containers. Colima is a tool that allows you to run Docker on macOS (and Linux) with minimal setup. It is based on Lima, which creates a QEMU VM with an HVF accelerator and handles networking and folder sharing. Colima provisions the Docker container runtime in a Lima VM, configures the docker CLI on macOS and handles all other minutiae.
Step 1: Install Colima and Docker
The first step is to install Colima and Docker on your macOS machine. You can do this easily with Homebrew, which is a package manager for macOS. If you don’t have Homebrew installed, you can follow the instructions here: brew.sh
Once you have Homebrew installed, you can run the following commands in your terminal:
# Apple Silicon
wget -O /usr/local/bin/colima https://github.com/abiosoft/colima/releases/download/v0.5.6/colima-Darwin-arm64
# Intel Mac
wget -O /usr/local/bin/colima https://github.com/abiosoft/colima/releases/download/v0.5.6/colima-Darwin-x86_64

# Afterwards, run these commands:
chmod +x /usr/local/bin/colima
brew install docker docker-compose
This will install Colima and Docker along with their dependencies.
Step 2: Start Colima
The next step is to start Colima, which will create and start a VM with Docker installed. We’ll also update the VM configuration and add a few networking-related changed by specifying --edit. You can do this by running the following command in your terminal:
colima start --edit
Once your text editor opens (nano by default, but if it isn’t, you can run export EDITOR=nano beforehand to change it), you’ll need to update the following lines:
network:
  driver: slirp
mountType: 9p
provision:
  # this ensures that your local network is always the next-hop, which is required for discovery to work
  - mode: system
    script: ip route del 192.168.5.0/24 dev eth0
  # updates the nameserver to use Cloudflare's DNS instead of the internal one which won't be accessible
  - mode: system
    script: echo "nameserver 1.1.1.1" > /etc/resolv.conf
Once you’re done editing the file, you can save it and exit the editor (Ctrl+X when using nano).
After Colima starts, it will also configure your local docker CLI to use the VM as the default context. This means that you can use the docker commands as usual without any extra configuration. You can verify that Colima is working by running the following command in your terminal:
docker version
You should see something like this:
Client: Docker Engine - Community
 Version:           23.0.2
 API version:       1.41 (downgraded from 1.42)
 Go version:        go1.20.2
 Git commit:        569dd73db1
 Built:             Mon Mar 27 15:44:26 2023
 OS/Arch:           darwin/arm64
 Context:           colima

Server:
 Engine:
  Version:          20.10.20
  API version:      1.41 (minimum version 1.12)
  Go version:       go1.18.7
  Git commit:       03df974ae9e6c219862907efdd76ec2e77ec930b
  Built:            Wed Oct 19 02:58:31 2022
  OS/Arch:          linux/arm64
  Experimental:     false
 containerd:
  Version:          v1.6.8
  GitCommit:        9cd3357b7fd7218e4aec3eae239db1f68a5a6ec6
 runc:
  Version:          1.1.4
  GitCommit:        5fd4c4d144137e991c4acebb2146ab1483a97925
 docker-init:
  Version:          0.19.0
  GitCommit:
Side note: QEMU vs VZ
I’ve done some testing with the newer
vzvmType, which uses the native macOS virtualization framework instead of QEMU. Unfortunately, it suffers from an issue where the underlying VM freezes when some amount of network traffic passes through it, causing all containers to stop working (issue tracked at abiosoft/colima#552). Therefore,qemuis currently the most stable option, and is the default.
Step 3: Configure colima to use the host network
This is a necessary step to ensure that Home Assistant is able to discover your devices and use any multicast-related functionality (for example HomeKit). To do so, you’ll need to install socket_vmnet and configure Lima to use it.
Install socket_vmnet
Run the following commands to install socket_vmnet. A pin command is also included as we’ll be relying on this package not being auto-updated.
brew install socket_vmnet
brew pin socket_vmnet
limactl sudoers | sudo tee /private/etc/sudoers.d/lima > /dev/null
sudo brew services restart socket_vmnet
Configure Lima to use socket_vmnet
Due to Lima’s limitations, you’ll need to find the full locations of socket_vmnet binary instead of using homebrew symlinks. To get their locations, run the following command in your terminal:
readlink -f $(brew --prefix)/opt/socket_vmnet/bin/socket_vmnet
Afterwards, using your favorite text editor, open the file ~/.lima/_config/networks.yaml and update the paths section to use the paths from the previous step. For example:
paths:
  socketVMNet: /opt/homebrew/Cellar/socket_vmnet/1.1.3/bin/socket_vmnet
We’ll also need to modify ~/.lima/_config/override.yaml to get Lima to use bridged mode. To do this, create ~/.lima/_config/override.yaml and add the following lines:
networks:
  - lima: bridged
Afterwards, restart Lima by running colima restart.
Step 5: Install Home Assistant on Docker
Now that we have Colima and Docker ready, we can install Home Assistant on Docker. There are a few ways of doing this, but I’ll demonstrate using docker-compose.
Create a new directory for your Home Assistant configuration files and create a new file named docker-compose.yml inside it. Add the following lines to the file:
version: '3'
services:
  homeassistant:
    container_name: homeassistant
    image: "ghcr.io/home-assistant/home-assistant:stable"
    volumes:
      - /Users/user/Docker/homeassistant:/config  # change this to your configuration directory
      - /etc/localtime:/etc/localtime:ro
    restart: unless-stopped
    network_mode: host
Afterwards, cd to the folder you’ve created and run the following command in your terminal:
docker-compose up -d
Step 6: Set up Home Assistant
Now that we have Home Assistant installed on Docker, we can access its web interface and set it up. Due to using bridged networking you won’t be able to see the IP address in colima list, however Home Assistant supports Bonjour so you should be able to access via this URL: http://homeassistant.local:8123. If this doesn’t work, you can also try logging into your router to check the DHCP lease list, and access home assistant via its IP directly. You should see something like this:
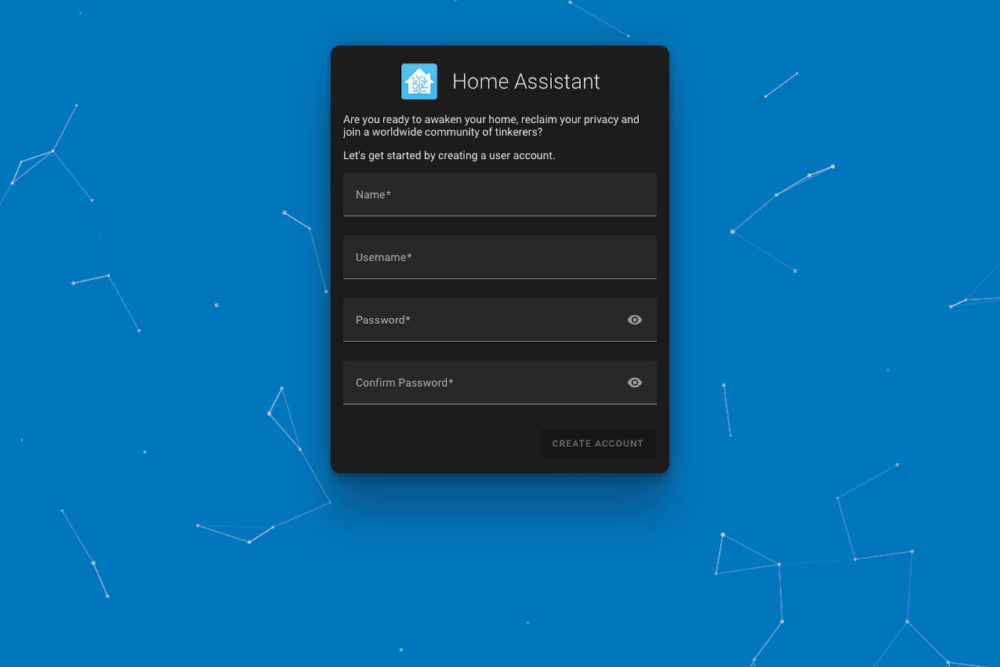
Follow the on-screen instructions to create an account, name your home, choose your location and units, and discover your devices. You can also customize your dashboard, add integrations, create automations, and more.
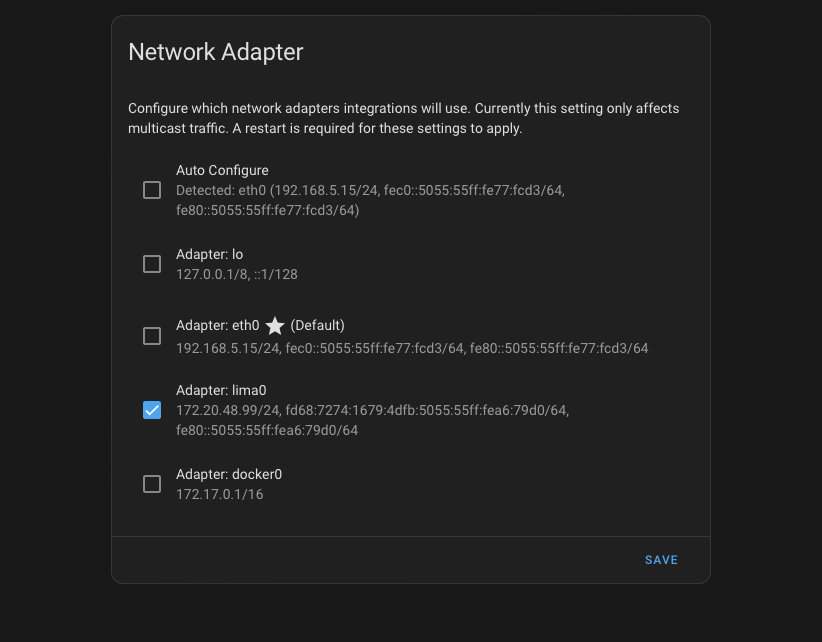
Note that discovery will still not work at this stage, you will first need to enable “advanced mode” in your Home Assistant profile page, then go to Settings → System → Network and change the network interface under “Network Adapter”. Uncheck “Auto Configure” and select the correct interface, it should be called lima0 and use the IP address of the Home Assistant instance. This is what it should look like:
Save your changes and restart Home Assistant. You should see a notification about discovered devices if you have any on your network.
(optional) Step 7: Configure a serial USB Zigbee/Z-Wave/etc dongle
If you have accessories that require a USB dongle to be accessed via Home Assistant, and the dongle uses serial communication (CC2531 or SkyConnect for example), you can use ser2net to pass it through to Colima. Use this guide and this ser2net configuration:
connection: &con01
    accepter: tcp,20108
    enable: on
    options:
        kickolduser: true
    connector: serialdev(nouucplock),/dev/tty.usbmodem1201,115200n81,local
Please note that the /dev/tty.usbmodem1201 part is unfortunately dynamic and changes with every reboot, so you’ll likely need to ensure that it’s kept up-to-date, followed by brew services restart ser2net.
Congratulations! You have successfully set up Home Assistant on macOS using Colima and Docker containers. Enjoy your smart home!